I learned a few things along the way.
- I have read that you should measure twice and cut once. I think you should measure twice, double check that you are actually starting with the ruler at 0. Do not rely on your poor math skills to remember that 2-11 is 9”; you will forget at some point and think it is 11”. Measure again. Then cut. I was supposed to make a 16 ½ inch square. It ended up being 15 ½ X 15. I tried to correct this by making my borders wider, but still miscalculated and ended up having three borders, the last a very thin rim around the rest of the pillow.
- Make your borders a little longer than what you need, whenever possible, then trim off the excess. I can never measure accurately enough for the borders to fit perfectly the first time.
- Sketch out the design and color it in with pencils or markers before buying fabric. This will avoid pink beside pink and light blue beside light blue. I just bought fabrics sort of at random, taking care that they would go together, but did not consider which colors would end up beside each other.
- Blocks will never be perfectly square. It’s a good thing I am a laissez-faire Aquarian, or I would still be trying to square up the fabric.
- Cats think they are helping, but aren’t, really.
- Masking tape can be your best friend. It can hold everything down when you are ready to baste. It can pick up loose threads, lint, and little black cat hairs.
- Measure the edges of the quilt and add them all up. For ease of figuring, let's pretend our quilt is 25" on each side. 25+25+25+25=100. Our bias tape needs to be at least 100" long. But we need to add some inches for going around corners and to allow for messing up calculations. Let's shoot for 120" of continuous bias tape.
- Check the pattern you are using for the width of tape you are supposed to be using. My pattern says 1 7/8". I actually rounded up to 2”, as it’s easier to calculate and allows me to wander a bit when cutting (have I mentioned I cannot cut a straight line, not even with a ruler and rotary cutter?).
- Figure out the usable width of the fabric you want to use. Let's say for ease of figuring that it's 40" wide.
- To figure out the number of strips you will get out of this fabric, divide the width of the finished strip by the width of the fabric. In this case, 40/2=20. Therefore, you will get 20 2" strips.
- Now you need to figure out how long your strips will be (and, therefore, the length of fabric you will cut). Take the total length of bias tape you will need, 120", and divide by the number of strips you will get from the fabric, 20. 120/20=6. Thus, your fabric length will be 6".
- Now, add ½” to all sides of the rectangle you are about to cut. You do need to remember to allow for seam allowances. Your width will be 40 ½” and your length will be 6 ½”. If you really think you will mess up, add a bit to either the length or width.
- Cut out your rectangle, then proceed with the instructions for making continuous bias tape.
The quilt, when finished, is supposed to be folded into thirds, then folded four times, then stuffed into the pocket to form a pillow. Here is how it really works:
- Lay quilt on floor.
- Remove cat, fold one long side over about 1/3 of the way.
- Remove cat, grab other long side.
- Remove cat.
- Remove cat.
- Remove claws from fabric.
- Give up and lie down beside cat.
 The front of the quilt
 The back (the black blob is Oliver inspecting the quilt)
 Oliver is testing the quilt
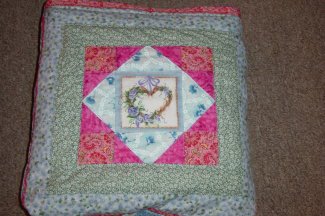 The pillow
5 comments:
It's gorgeous! I absolutely LOVE your instructions for folding it, of course :> Ooh, I'm going to try logging in as "other" now, so it won't put the wrong URL in my name.
Wow! What a lovely quilt, complete with kitty attached! I finally finished my kitty themed quilt and William is pleased. I think after I finish "current quilt" I want to make two of those quillows for my boys. Well...okay three, one little one for William.:-) (Williamcat)
I followed your link to your cat pictures from the about.com forum - then had to come check out your blog. I love the folding directions on your quillow! I have 2 cats of my own, and if you sew two 2-inch squares of fabric together, they will find them and lay down on them! Your cats are beautiful!
Hey Lauren! I tagged you on a meme :> I didn't make it voluntary, but they're kind of fun. See my entry for 3/24. AFAIK rules aren't strictly enforced :)
Lauren,
I so enjoyed your instructions for folding the 'quillow'...a pillow quilt! Mine would have included removing a dog or two, along with the cats! Good thing they are cute, huh?
Also...great cat quilt! You did good girl!!!
Sally
Post a Comment